Sunday, April 17, 2011

camera obscura and lucida


**Warning: This blog is currently suffering from formatting issues and is not as pretty as it could be.  Please disregard as best as possible.  
Room Camera Obscura: 


Introduction:

Camera obscura is derived from latin to mean darkened room. The earliest mention of a device similar to a camera obscura was made by the Chinese philosopher Mo-Ti (5th Century BC). He inverted an image into a darkened room through a pinhole. Aristotle was said to understand the optical illusion of the camera obscura as he viewed the crescent shape of a partially eclipsed sun projected on the ground through the holes of a sieve and the gaps between leaves of a plane tree. In 1490, Leonardo Da Vinci gave descriptions of camera obscuras in his notebooks.

The first camera obscuras were darkened rooms, like Dutch Scientist Reinerus Gemma-Frisius used to view a solar eclipse in 1544.

File:Cameralucida01.jpg
Lucida in use:http://en.wikipedia.org/wiki/File:Cameralucida01.jpg 

The images were improved with the addition of a convex lens on the aperture in the 16th century. The later addition of a mirror to reflect the image onto a viewing surface. A camera lucida is the term used when the image is reflected down onto a viewing surface. Giovanni Battista Della Porta suggested in his book Magiae Naturalis published in 1558, that these be used for drawing assistance. 
File:Camera obscura2.jpg
room camera obscura illustration
Riva Degli Schiavoin, Venice, Canaletto, 1740
Painted with the use of a camera obscura.
Grand Tour Gentlemen would purchase these type paintings because it looked like how it looked when they saw them, alive and with the right perspective. 
CAM_OBS_KEPLER_1620.GIF
Johannes Kepler Tent obscrua:
The term "camera obscura" was first used by German astronomer Johannes Kepler in the early 17th century. He used a portable camera for surveying in Upper Austria. In the 17th and 18th centuries, artists used portable camera obscuras to assist in their drawing or realistic scenes. Such artists include Jan Vermeer, Canaletto, Guardi, and Paul Sandby. By the beginning of the 19th century, the camera obscura could be used with photosensitive paper with little to no alteration in design. 
Room camera obsuras were popular in the 19th century as well, used as for education and entertainment. With the addition of a lens, the images could become bigger and crisper. They were placed in parks with beautiful scenery, along beaches, and other places of interest.

cam_ob_santa_monica.jpg
Postcard: Famous Camera Obscura Santa Monica, Calif. c.1900
http://www.acmi.net.au/AIC/CAMERA_OBSCURA.html
Some camera obscuras can be seen here: http://brightbytes.com/cosite/portable.html

Some camera obscuras found in US parks can be seen here: http://brightbytes.com/cosite/portable.html

This information was summarized from: http://brightbytes.com/cosite/what.html

Additional Links –

Timeline of the History of Photography: http://www.historiccamera.com/history1/photo_history300.html

[click two page advances to find information on camera obsucra]

Timeline of Historic Cameras:

http://www.historiccamera.com/historiccameras/historiccameras.html

Video:

What is a camera obscura and how does it work: http://www.youtube.com/watch?v=tmAPtrpdoZw

Book: http://books.google.com/books?id=00gWAAAAYAAJ&printsec=frontcover&dq=Camera+obscura&hl=en&ei=EfarTdShNITl0gGjlYH6CA&sa=X&oi=book_result&ct=result&resnum=3&ved=0CDQQ6AEwAg#v=onepage&q&f=false
 

Process:

camera obscura with mirror: 
http://wikis.lib.ncsu.edu/index.php/GD_342/Glossary
The process to make a camera obscura with a lens is to determine the focal length of the lens first. The focal length will determine the size of the box in which the image will be projected. With a longer focal length, the screen on which the image is projected must be farther away. With a shorter focal length, the screen must be closer. So once deciding what the focal length is, the distance where the image must project will be known. From there, you can decide to use either a mirror, or just a screen. Using a mirror: the mirror must be placed at a 45 degree angle in order to project the image up 90 degrees, on to the top of the box where the screen would be placed. Should a simple screen be used, the screen must only be placed at the end of the focal length but the image will be upside down. 
Traditionally, the boxes were made of wood and a piece of grounded glass would be placed wherever the screen is required. The grounded glass captures the image. Sliding camera obscuras can be used, and this is where the lens can move farther away from the screen in order to focus, like zooming on current cameras.

A camera obscura can be made out of anything. From paint cans to tins, Pringles cans, cardboard boxes (ex. Cereal boxes, Pop Tart boxes, etc), anything can be used. The goal is merely to provide a dark space in which to view a screen on which an image is projected from through a lens or pin hole. Pin holes will provide an image, but when using a lens, the image will be clearer. Plans for camera obscuras can be adjusted in whatever fashion in order to achieve this goal.

How they work:

When light hits an object, it reflects the image, like a seeing your reflection on the surface of a pond. When the light rays, when narrowed by a hole or a lens, will focus the light and rays flip, thus flipping the image. A lens will focus the image more than a pinhole by bending the light.  The screen or back of a room, catches the image, upside down. If the image moves closer or farther away from the hole, the image within the camera obscura will adjust and grow fuzzy as it cannot focus. These pictures help demonstrate how light travels and creates the image.

Example of light bending with contact of a lens, the grass being a lens, then the direction/trajectory of the shopping cart being the light.  When the rays of light contact the lens, they bend and alter which can lead to distortions in the actual image, a fishbowl effect.  

http://en.wikipedia.org/wiki/Lens_(optics): a good site for a quick review of how lenses work with plenty of pictures showing light traveling through various types of lenses.

http://rctc-photo-1.blogspot.com/2011/01/web-work-2.html


My Camera Obscura Project:


For my camera obscura we used a lens to focus the image. When using a lens it is necessary to measure the focal point of the lens. I used a magnifying glass I bought at a hardware store for a few dollars, even though we were given a plastic magnifying glass for class. I decided to use my own image as it was clearer. The plastic magnifying glass we were given did not have a smooth surface and thus distorted the image. The glass magnifying glass was clearer, however, it will alter the focal length, making it different from others in class that used the given magnifying glass.

To measure the focal length, the glass was held up near a wall with a window behind it. The image of the window will appear on the wall. Moving the lens forward or back from the wall until the image is clear is the proper focal length. I then measured the distance of the lens from the wall to discover the focal length. The focal length was quite small, about 65mm. Others in class had focal lengths of up to six inches.

lens taped in toilet paper roll

The next step I did was to make a tube to hold the lens. Cutting the toilet paper roll down one side, lengthwise from opening to opening, I adjusted to opening to around the lens and then taped it around lens. It is important to know how far the tube open is behind the lens as it plays into the focal length. The tube was too long and I cut it down to shorten it. I then put the tube against the box that would be the camera obscura, and traced the circle to cut out. Once cut out, the circle allowed the tube to be inserted into the box. Tape around the end of the tube ensured a nice fit. 
Disassembled Camera obscura.  Lens detached from box.  Box opened to show screen inside and hole for viewing.
In the space of the square, I used various different screens to see which worked best, from a coffee filter; to a translucent, gray, plastic binder divider; to a tissue held between two pieces of plastic; and then finally wax paper. Wax paper worked best. I wasn't really experimenting with different types of screen for the sake of experimentation, but because the suggested wax paper was not available at the time of construction of my camera. Still, the results are this:

Coffee filter was too dark. An image could be seen but it wasn't very clear. It was hard to tell if the focal length needed adjustment or if the screen needed to be thinner, clearer.

The greyed plastic binder was too clear. The circle of light was too bright and bleached out most of the image in the center of the screen. However, on the outskirts of the image, I could make out a faint, ghostly translucent image. This was too clear. I attempted three sheets of plastic to increase the density, but the image remained too clear for each. I decided to try finding something to place between two sheets of plastic and decided on two ply tissue, but separating the ply to make just one.

With the tissue in between, the image could be seen, but it still wasn't as clear as I would later see with wax paper. However, after adjusting the screen and the tube a little for maximum clarity, it made a clear image. Once wax paper was made available, I replaced the tissue and the plastic with wax paper. The image was clearest in this method. After finding the clearest screen, I adjusted the tube, pushing it in and out to see if the image could become clearer. I managed to make a very clear image.


The short focal length made it necessary for the camera obscura to be very close to the image you actually wanted to see, about two feet or so from the front of the tube. The image is upside down, because of the way the light comes in through the lens and then flips as the rays of light that hold the image cross and project an upside down image on the screen. A mirror could have been used to project the upside down image onto the top of the camera obscura, where the screen would then be placed. This would right the image orientation. However, I decided not to use a mirror, though I thought it interesting to try.


Upper right corner shows image through camera obsura (flipped for clarity, would be upside down)  Distance required for clear image shown in left picture.  

My courses link I found helpful in this project (probably only accessible by RIT students enrolled in the class): https://mycourses.rit.edu/d2l/lms/content/viewer/main_frame.d2l?ou=334489&tId=1750709


Additional Information:

A great link that tells a lot on camera obsuras and more: http://www.acmi.net.au/AIC/CAMERA_OBSCURA.html


Whole rooms can be turned into camera obscuras, such as your bedroom. By applying the proper lens or hole in a shade that blackens the room, in the morning when the sun comes up and light shines on the outside, the image of outside will be inverted into the room for as long as it remains dark. Opening the shade will obviously make it too bright to show the image that would be projected on the wall.

To do this yourself with more specifics follow this link: http://www.funsci.com/fun3_en/sky/sky.htm

BBC: A camera obscura room: http://www.youtube.com/watch?v=RuJ_Jd6Qgyo Great Video! We should totally do this in a classroom J


Summary:

Camera obscuras and lucidas alter light into images by concentrating them onto a surface. Making camera obscuras in parks must have been truly entertaining in the day - to spy on someone and not being seen. To make a large room size camera obscura seems like the greatest experiment. It would seem that a portable camera obscura works best with a wax paper screen. It would have been nice to be able to see things farther away within the camera obscura but the lens picked did not allow for that. If this project was to be redone, it would be best to evaluate several lenses to pick the right one for a clearer, farther picture.

camr_ob6.jpg
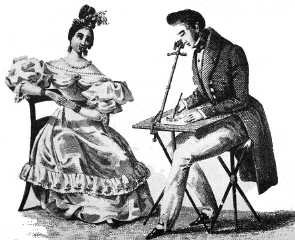
19th Century Cartoon
depicting Camera Obscura
http://www.acmi.net.au/AIC/CAMERA_OBSCURA.html


salted paper and photogenic drawing


**Warning: this blog is currently suffering from formatting issues and is not nearly as pretty as it could be.  Please disregard it as best as possible.

Salted Paper Print: 

Introduction:

A photogenic drawing is an image applied to paper by the use of contact on a photosensitive surface. It is primarily a sort of silhouette, though the density of the object applied can alter the outcome, for example a leaf pressed against photosensitive paper and exposed to sunlight can let some UV rays through the thinner portions of the leaves but not the veins as they are denser allowing the veins to show up within the leaf image as an end result when typically, or in theory, should everything have the same density and no other light rays get through all the images would be simple silhouettes.

The way in which the light hits the paper is also important. The darkest exposure will be through direct sunlight, but as light bounces off of items, sunlight that has hit an object can affect the outcome of the image as well, leading to lighter or even darker spaces (should more light be directed to one area) on the final image for an object that isn't pressed completely flat to the paper. It is important to be aware of how light can bend because should you use glass plates over your objects to hold down them down during exposure and must make due with, say, multiple sheets or the corner of glass might cut across the paper in some manner, while you might think that since it is clear it will do nothing, you will find that a line can develop since the light will enter through the glass and bend at the corner, thus altering the density of light in that area and leaving a visible line. 
The images are warm in tone because they use sunlight to develop called printing out.  Because the sun develops the image and not chemicals in a dark space, the warmth is evident in the photos.  When the image is fixed with hypo, the image is lighter because the silver is removed.  But when the image is fixed with salt, the silver is not removed and no bleaching occurs.  This keeps the picture dark, and can potentially lead to further darkening if exposed to sun as the salt doesn't guarantee the silver from not reacting and further darkening
floating paper in salt solution
Salted paper is a photosensitive paper in which salt is applied to a page and then silver nitrate is brushed over top of that (with drying in between). The dry salt reacts with the silver applied in the top coat (two coats worked best in experimentation – see blog post: photogenic drawing for data on best concentrations, coats and paper for experimentation) and produces silver chloride which is a photosensitive compound insoluble in water. When exposed to light, particularly sunlight, though results can be achieved with very little sunlight and thick cloud cover - the exposure is will longer, the silver will darken and anything blocking light from the paper will leave an image. However, without fixing, the image will not last as once the object is removed the light will activate and darken the remaining silver compound on the page until the entire thing is dark and no more image exists. To prevent the further reaction of sunlight and silver, the image can be fixed onto the page through two methods. Soaking the images in salt saturated solutions will apply more salt to the page and while it does not effectively remove the reactant silver it will make it harder for the silver to react through the excess salt.

The other method of fixing an image, a better method and more popular, is the use of hypo. Hypo is sodium thiosulfate. It works by removing undeveloped silver chloride crystals from the paper and thus preventing the image from darkening into obscurity. However, it will lighten or bleach the images greatly and a lengthy exposure time is suggested in order to retain a darker image after the hypo bath regardless with how quickly the image may darken once exposed to the sun.

Historical Background –

Talbot's Camera Obscura Replica 1820 (2)
Photogenic drawings were developed by William Henry Fox Talbot, a gentleman scientist. He announced the results of his experiments in 1839. The images created are silhouettes or negatives and his solution to fix the images consisted of the above mentioned salt bath. John Herschel picked up Talbot's experiments and discovered the fixing method of hypo.  Talbot used camera obscuras to create tiny images. Further information on Talbot and Herschel can found:


Talbot: http://www.rleggat.com/photohistory/history/talbot.htm

Herschel: http://www-groups.dcs.st-and.ac.uk/~history/Biographies/Herschel.html


Process:

The basic procedure for creating salted paper is to immerse or coat a page of good quality paper on which an image is desired, and then dry it. After a coat of silver will be applied though historical documents change the approximate concentration of salt and silver solutions, and some other specifics as the people of the 18th century were experimenting with finding the best methods, as we did in a previous lab [see photogenic drawing experiment for details]. See 'Our Experiment' below for the process we utilized.

Salted paper and photogenic drawing were one of the first real ways of capturing images in a relatively short period of (exposure) time. It became a rather popular method with its simplicity in creation opposed to the Daguerreotype that used a relatively complicated method with harsh chemicals [ more information (a quick introduction) on Daguerreotypes can be found: http://en.wikipedia.org/wiki/Daguerreotype]. Several publications of the 19th century deal with the photographic process of salted paper and the application to make photosensitive papers for images, as well as hypo fixing methods. One such publication is:

http://books.google.com/books?id=j2USAAAAYAAJ&pg=PA139&dq=salted+paper+photogenic+drawing&hl=en&ei=_KmrTdueIeGG0QHb_b35CA&sa=X&oi=book_result&ct=result&resnum=2&ved=0CEYQ6AEwAQ#v=onepage&q=salted%20paper%20photogenic%20drawing&f=false

It mentions soaking the paper in a salt solution and then pressing it with a wooden press to keep it flat and smooth. The objective is to keep the paper on which the image will be printed clean and pretty to look at. This is different than what was suggested for our lab procedure where the surface of the paper was brushed with salt solution. We had also taped it to the surface in an attempt to keep it from bubbling up aggressively and then curling during drying. The bubbled paper texture still occurs with the wetting of the paper, but is not as severe as if it was left untapped.

Another publication, Light: An examination of all the phenomena connected … by Robert Hunt, mentioned a manner in which the sensitivity of the paper can be maximized if a paper was made, salted and silver applied, and then kept for several weeks. Through the reapplication of silver to the surface "it becomes sensible to Light, even more than it was at first." http://books.google.com/books?id=GqoaAAAAYAAJ&printsec=frontcover&dq=Light:+An+examination+by+Hunt&hl=en&ei=SrOrTemAMMWtgQedg9jzBQ&sa=X&oi=book_result&ct=result&resnum=1&ved=0CEAQ6AEwAA#v=onepage&q&f=false


Our Experiment:

Silver to be applied to papers
Drying between coats
For the purposes of our lab, our group used salt and silver solutions of 2% and 12%, respectively, with two coats of silver and no additional salt coat in between. The paper was dried between each coat. First, salt was applied with a pipette and then spread over the paper with a sponge brush. A hair dryer was used to dry in between coats on a low setting. A coat of silver was applied as smoothly as possible, else poor sensitivity will develop on the page leading to poor images or a ghosting effect. After using a hair dryer once more to dry the paper, another coat of silver was applied to the page. The page will be covered with a silver compound that is insoluble to water called silver chloride. Crystals of this compound bond on the surface of the paper. The density of these crystal formations are affected by the concentration of silver and salt in each area. If the salt or silver is not applied smoothly over the surface of the paper, then ill effects can occur. The dual coats of silver tend to limit the possibility of a poor image.

We did not experiment in alternating salt coats as mentioned in the above reading though it may be interesting to try in the future.

It is important that once the paper is sensitized with silver that the light exposure is limited until the actual exposure is desired. The paper will steadily darken in limited light so it is best to exposed the papers as desired as soon as possible, particularly when a dark room is ill equipped as a darkroom (i.e. light sneaking in around the edges of blinds as in our classroom).

For the sake of our experimentation, we desired to test the effect of colored filters on the image. Three filters were cut from cellophane in the colors: yellow, red, and blue. It was our belief that the colored filters will affect the overall image. In order to test the effect of no filter on the page and for a little artistic expression, we cut stars into the centers of the cellophane and then applied them, with tape over three individual squares of sensitized paper. The stars cut out of the center, however, were not flattened to the surface of the paper and created difficulties later in the exposure. Glass should have been applied to the surface to keep the corners within the star from sticking up and thus letting light slip underneath the filter.
Our objects: filters, wood cut flower, false flowers, etc
Four other photogenic drawings were made using items brought from home. Potpourri, false flowers (not plastic but sort of thick, structured fabric), and a flower wood cut out used as objects for our drawings. These were primarily done for fun, in my opinion, and the results were quite pleasing and exciting. Glass was used over top the objects to prevent them from blowing away. Four sheets of glass were placed over top, creating the above mentioned lines after the fact.

On two large cutting boards, we taped three papers for the filter test and then four papers on the other for our drawings. Salt and silver were then applied to the papers. Tape on all four sides of our squares kept the bubbling to a minimum. Once dry, we applied our above mentioned objects and filters to the papers and planned for exposure. Glass was only used on the object images, not the filter images.

Filtered Experiment Exposure
Objects exposed to sun with glass over top
Still attached to their boards, we took the images out into the sun. It was a sunny day, though a bit of wind blew around campus. The images began to change and darken within thirty seconds of exposure. For the sake of a dark image that would not bleach out as badly when put through the hypo baths, we exposed our images for three minutes. When going out with the star filters, the way the sun came down affected the images as we turned them from when we went down the steps when first going outside to when we put them in their final resting place for the duration of the exposure time. Therefore, light snuck underneath the filters on two sides, altering the way the stars came out over all (though admittedly they were not the best star cut outs, just something done quickly).

The objects images developed as quickly as the filters. These two boards were taken out a different times, though one followed shortly after the other. A breeze got underneath the glass and moved an petal of potpourri from one image to another close by. The result was interesting as the place where it had been turned a bit ghostly, while the final resting place didn't darken as darkly as the rest of the image background, giving a sort of ghostly look, but hardly noticeable unless you were looking for it. It was particularly bleached out after the hypo bath, further making it less noticeable.


Observations/Experience:

The images came out quite dark, even after the fixing bath. The overall result was exciting to see everything working so quickly – our first experiments with contact printing being anthotypes is quite slow and not nearly as exciting for college students of the 21st century. The dark backgrounds and the lighter object images were negatives. The false flowers were not completely opaque to the sun's rays and thus darkened a decent amount underneath the objects. It left a gray image underneath. The result had some depth to the images I didn't expect.

Object Images after exposure, before hypo bath
The woodcut flower had some depth to it as well. The way the sun hit the corners of the object shadowed some of the space within and thus limited the exposure to the sun's rays, making it not as dark. It looked more like the flat cut out than I expected, as I had just expected the overall flat image without depth.

Click here for a larger view.
blue filter after exposure
Click here for a larger view.
red filter after exposure
Click here for a larger view.
yellow filter after exposure
The filters were interesting to see and I had little idea on what the overall result might be. The blue turned out to make the darkest image, turning so dark that the star was not visible at all after the exposure (before the hypo bath). Yellow and Red filters had similar results, leaving faded, not very dark images. 
red filter photo after hypo
yellow filter photo after hypo
blue filter photo after hypo
The hypo bath lightened the pictures a lot. At first, we thought the images were lost, but with the hypo bath (this was the first time we used hypo for fixing) the solution bleached the images, revealing the stars on the filter experiments as well as making the false flower images to be more visible.
In our excitement with our lab and actually creating images that were quite clear, we used the rest of our lab time to make more papers and exposed them, though some of us took some home to attempt images with camera obscura. There are no results of these additional experimentation, but it is something quite fun to do. Time constraints, however, limit the number of tests or fooling around that we could do. It is only a two hour class.


Before Hypo Bath.  See depth along bottom edge.
It is important to remember that silver cannot be put down the drain in clean up. So any silver nitrate experimentation performed should be kept in containers and exposed of properly. This includes the silver concentrations, and hypo solutions that remove silver to keep from over exposing. The water used for rinsing the images is not something that has to be kept as the silver chloride is insoluble and will not wash away down the drain.
After Hypo Fixing
The hypo bath was arranged as four stations. Three minutes spent on each bath was necessary. The papers are immersed in a water rinse, then a hypo bath and then another hypo bath, ending in another water rinse. An hour of rinsing is required to remove any excess hypo from the images. This was performed at home as there was no more time in class. Keeping the images damp, we took them home to perform the final rinse. The hypo solution was a ten percent concentration made up by the instructor and the student assistant as the class went about their lab, making photosensitive papers and then exposing them.

Additional Information on Salted Paper and Photogenic Drawings can be found:

On Processes: http://www.alternativephotography.com/wp/processes/saltprints/a-dash-of-salt

On Processes: http://unblinkingeye.com/Articles/Salt/salt.html

Images in the Library of Congress: http://www.loc.gov/pictures/related/?fi=format&q=Salted%20paper%20prints--1850-1860.

Some History: http://albumen.conservation-us.org/library/monographs/reilly/chap3.html

Modern Day Salted Paper Artist: http://www.artlimited.net/image/en/278520

Summary:

Making salted paper is easy and relatively quick to do, allowing for easy fun. The silver is something to be careful with, however, as it can burn your skin. When working with silver nitrate, it is important to wear a lab coat to protect your clothes and skin, to wear gloves to protect your hands, and to wear goggles to protect your eyes. Not doing so is sort of foolish and not really something that is so hard to do that is avoided. It is best to only make the paper to be used to avoid any unwanted exposure beforehand in our situation, as the room we work in is not the darkest of rooms. Playing around with different types of translucent objects, perhaps color glass, and some objects that are thinner or thicker in density would be fun to do should there be more time. Should the opportunity to play around with process arise again, it would be interesting to experiment with digital negatives and creating what would be considered a photograph of these days, actual images of rooms, or something with a camera obscura, of even portraits in some manner. The color glass would be a particular interesting activity as it would bring into effect the filter papers that we experimented with. Different colors lead to different effects on the light filtering through to the paper and provides an interesting result.  A collage of glass and other objects might be something interesting, as well as the removal of objects and replacement with a new object to further play with the ghosting effect.


Image References:

1 - http://www.precinemahistory.net/images/talbot_oval.gif

2 - http://www.ssplprints.com/lowres/43/main/19/98554.jpg